The 2026 Guide to Freezing Seasonal Produce: Extend Your Harvest by 6 Months with These 5 Techniques
As the seasons change, so does the bounty of fresh produce available. There’s nothing quite like the taste of a ripe, juicy strawberry in summer or a crisp ear of corn straight from the stalk. However, the fleeting nature of these seasonal delights often leaves us wishing we could savor them for longer. Good news! With the right techniques for freezing seasonal produce, you can extend your harvest and enjoy those vibrant flavors and essential nutrients for up to six months, or even longer. This comprehensive 2026 guide will equip you with the knowledge and methods to become a master of food preservation, reducing waste and boosting your pantry’s year-round appeal.
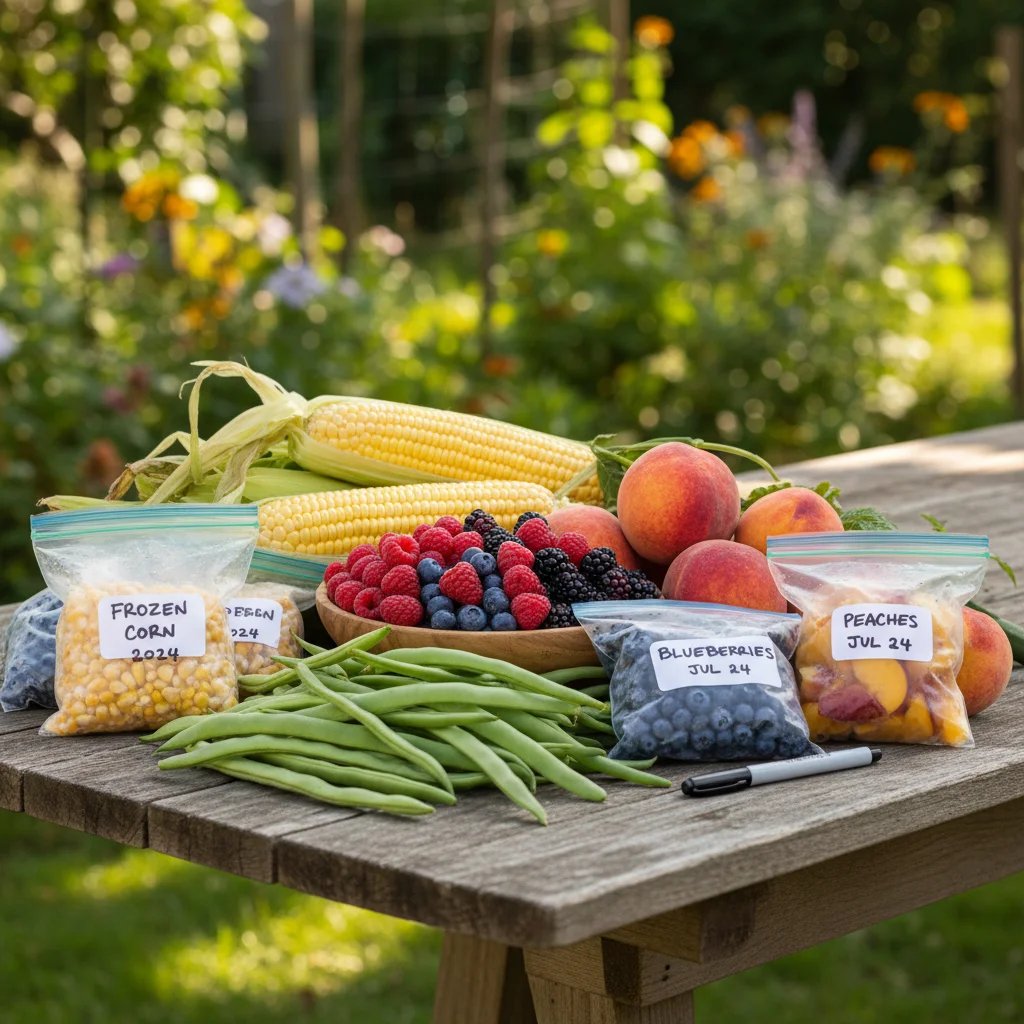
Imagine enjoying sweet peaches in the dead of winter or adding fresh-tasting berries to your morning smoothie in spring. By learning how to effectively freeze your favorite fruits and vegetables, you’re not just preserving food; you’re preserving flavor, nutrition, and a connection to the seasons. This guide delves into the best practices, from selecting the perfect produce to the five essential techniques that will revolutionize your approach to freezing seasonal produce.
Why Freeze Your Seasonal Produce? The Benefits Beyond Extended Shelf Life
The primary reason for freezing seasonal produce is, of course, to make it last longer. But the benefits extend far beyond mere preservation. Let’s explore why this is an invaluable skill for any home cook or gardener:
- Nutrient Retention: Freezing, when done correctly, locks in vitamins, minerals, and antioxidants. In many cases, frozen produce can be even more nutritious than fresh produce that has traveled long distances and spent days on a store shelf.
- Cost Savings: Buying produce when it’s in season and abundant often means lower prices. Freezing allows you to stock up during peak season and save money throughout the year, avoiding higher off-season costs.
- Reduced Food Waste: Don’t let excess harvest go to waste! Freezing is an excellent way to utilize surplus produce from your garden or farmers’ market haul, contributing to a more sustainable lifestyle.
- Convenience and Time Saving: Pre-portioned and ready-to-use frozen produce can be a lifesaver on busy weeknights. Imagine having pre-chopped onions, blanched green beans, or berry purees ready for cooking or baking.
- Year-Round Flavor: Craving summer’s sweetness in January? Freezing allows you to enjoy the peak flavor of seasonal produce long after its growing season has passed.
- Avoiding Preservatives: When you freeze your own produce, you control what goes into it – nothing but the pure fruit or vegetable, free from unwanted additives often found in commercially processed foods.
Understanding these advantages underscores the importance of mastering the art of freezing seasonal produce. It’s an investment in your health, your wallet, and your culinary adventures.
Essential Tools for Successful Freezing Seasonal Produce
Before diving into the techniques, ensure you have the right equipment. Having these items on hand will make the process of freezing seasonal produce much smoother and more effective:
- Freezer-Safe Bags or Containers: Look for heavy-duty freezer bags designed to prevent freezer burn. Rigid plastic containers or glass jars (leave headspace for expansion) are also excellent options.
- Baking Sheets: Essential for flash freezing, which prevents produce from clumping together.
- Parchment Paper or Silicone Mats: Line baking sheets to prevent sticking during flash freezing.
- Blanching Pot and Slotted Spoon: For vegetables that require blanching, a large pot for boiling water and a slotted spoon or spider are crucial.
- Large Bowl with Ice Water: Immediately chilling blanched vegetables is vital to stop the cooking process.
- Labels and Permanent Marker: Clearly label everything with the contents and date of freezing. This is non-negotiable for an organized freezer.
- Sharp Knives and Cutting Boards: For efficient preparation.
- Colanders: For washing and draining produce.
Having these tools ready will streamline your freezing process and help you achieve the best results when freezing seasonal produce.
General Tips for Freezing Seasonal Produce Effectively
No matter which technique you use, a few universal principles apply to all forms of freezing seasonal produce:
- Choose Peak Quality: Only freeze produce that is at its peak ripeness and freshness. Overripe or damaged produce will not improve in the freezer and may even degrade further.
- Wash Thoroughly: Clean all produce meticulously to remove dirt, pesticides, and any insects.
- Prepare as Desired: Trim, peel, chop, or slice your produce into the forms you’ll likely use in future recipes. This saves significant time later.
- Prevent Freezer Burn: This is the enemy of frozen food! Freezer burn occurs when food is exposed to air, leading to dehydration and flavor loss. Remove as much air as possible from packaging.
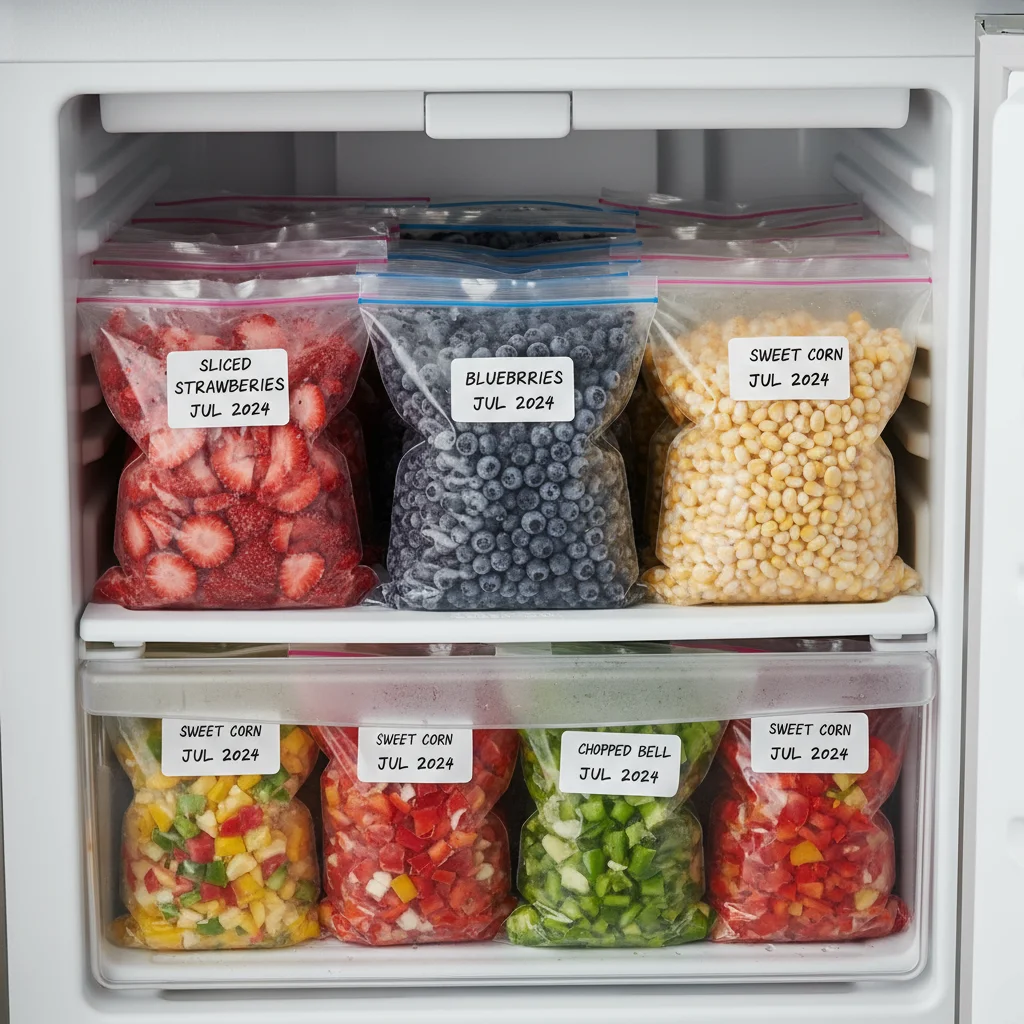
- Label and Date: Always, always label your packages with the contents and the date of freezing. This helps with inventory and ensures you use items before their quality declines.
- Freeze in Usable Portions: Think about how you’ll use the produce. Freezing in meal-sized portions prevents you from having to thaw more than you need.
- Don’t Overload Your Freezer: Freezing too much at once can raise the freezer’s temperature, potentially affecting the quality of already frozen items. Freeze in batches if necessary.
Adhering to these general tips will significantly improve the quality and longevity of your freezing seasonal produce efforts.
Technique 1: Blanching (Essential for Most Vegetables)
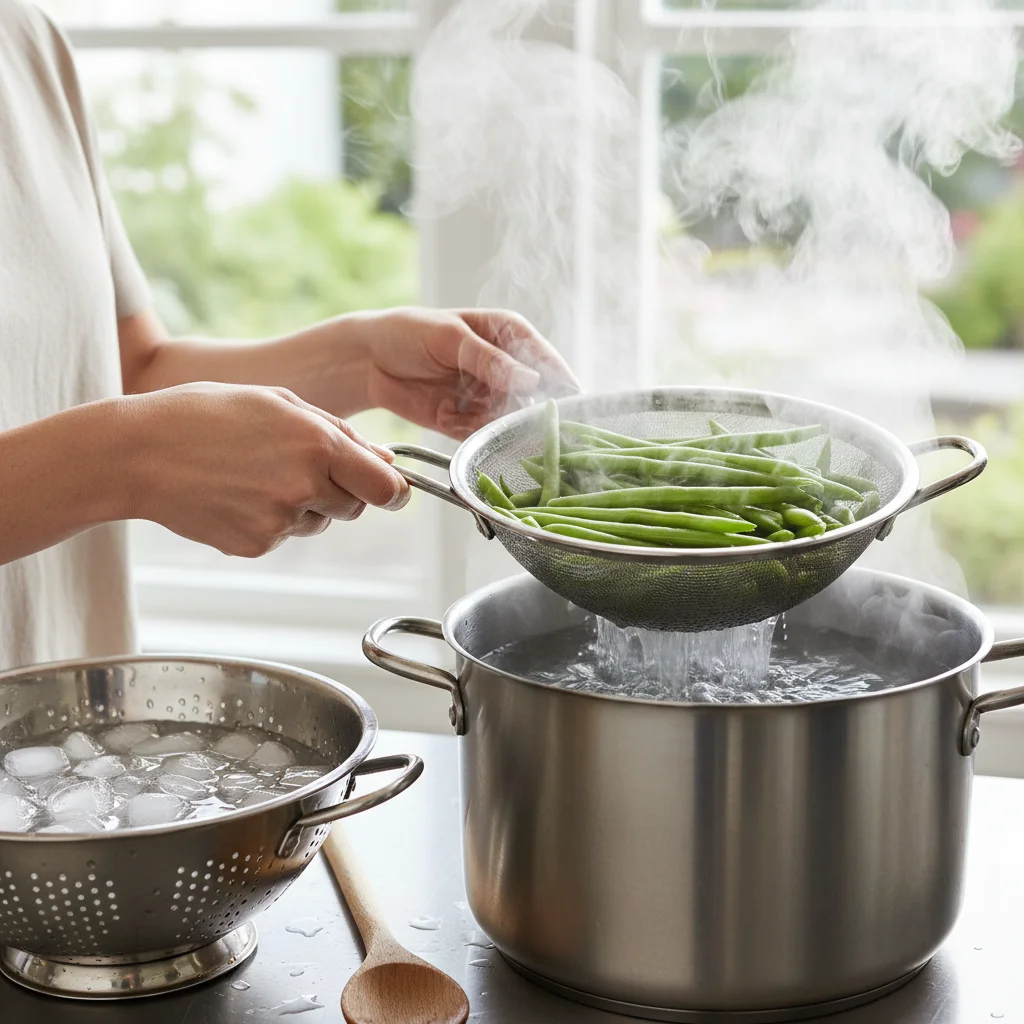
Blanching is a crucial step for many vegetables before freezing seasonal produce. It involves briefly boiling vegetables in water, then rapidly chilling them in ice water. This process serves several vital purposes:
- Stops Enzyme Action: Enzymes cause vegetables to ripen and eventually spoil. Blanching deactivates these enzymes, preventing loss of color, flavor, and nutrients during freezing.
- Cleanses and Brightens: It helps clean the surface of the vegetable and brightens its color.
- Softens and Shrinks: Blanching slightly softens the vegetable, making it easier to pack, and can reduce its bulk.
How to Blanch Vegetables:
- Prepare Vegetables: Wash, trim, and cut vegetables to your desired size (e.g., green beans, broccoli florets, sliced carrots).
- Boil Water: Bring a large pot of water to a rolling boil.
- Prepare Ice Bath: Fill a large bowl with ice water. This is critical for stopping the cooking process.
- Blanch: Submerge a small batch of vegetables into the boiling water. Do not overcrowd the pot, as this will lower the water temperature too much.
- Timing: Blanch for the recommended time (e.g., 2-3 minutes for green beans, 1-2 minutes for broccoli). Consult a reliable source for specific vegetable blanching times.
- Chill Immediately: Using a slotted spoon, quickly transfer the blanched vegetables from the boiling water to the ice bath. Chill for the same amount of time they were blanched.
- Drain and Dry: Once thoroughly chilled, drain the vegetables well and pat them as dry as possible with a clean towel. Excess water can lead to ice crystals and freezer burn.
- Freeze: Proceed to flash freezing (Technique 5) for best results, then transfer to freezer bags or containers.
This technique is indispensable when freezing seasonal produce like green beans, broccoli, cauliflower, corn (kernels or on the cob), peas, and asparagus.
Technique 2: Dry Pack Freezing (Ideal for Many Fruits)
The dry pack method is straightforward and excellent for fruits that hold their shape well and don’t require blanching. This is a common and effective way of freezing seasonal produce like berries, cherries, and even some chopped vegetables after blanching.
How to Dry Pack:
- Prepare Produce: Wash thoroughly and dry completely. For berries, remove stems. For larger fruits like peaches or plums, pit and slice them.
- Flash Freeze (Recommended): Spread the prepared produce in a single layer on a parchment-lined baking sheet. Place in the freezer for 1-2 hours until solid. This prevents them from clumping together.
- Package: Once frozen solid, transfer the individual pieces into freezer-safe bags or containers.
- Remove Air: Squeeze out as much air as possible from bags or use a vacuum sealer if available.
- Label and Store: Label with contents and date, then return to the freezer.
This method is perfect for freezing seasonal produce such as blueberries, raspberries, strawberries (whole or sliced), cherries, cranberries, and even chopped bell peppers or onions that you want to use individually.
Technique 3: Sugar Pack Freezing (For Sweet Fruits)
Adding sugar before freezing helps maintain the fruit’s texture, color, and flavor, especially for fruits that are prone to discoloration or becoming mushy. This method is particularly popular when freezing seasonal produce like peaches, strawberries, and plums destined for desserts or jams.
How to Sugar Pack:
- Prepare Fruit: Wash, peel, pit, and slice fruit as desired.
- Combine with Sugar: Gently toss the prepared fruit with a small amount of sugar. The general ratio is about 1/4 to 1/2 cup of sugar per quart of fruit, but this can be adjusted to taste. The sugar will draw out some of the fruit’s juices, creating a syrup.
- Pack into Containers: Ladle the fruit and its generated syrup into freezer-safe containers, leaving about 1/2 inch of headspace to allow for expansion.
- Seal and Freeze: Seal the containers tightly, label, and freeze.
When freezing seasonal produce with this method, the sugar helps to protect the delicate cell structure of the fruit, resulting in a better quality product when thawed.
Technique 4: Syrup Pack Freezing (Best for Delicate Fruits)
Similar to the sugar pack, the syrup pack method uses a sugar syrup to protect delicate fruits from freezer burn and maintain their texture. This is often preferred for fruits that brown easily or have a very soft texture. It’s an excellent method when freezing seasonal produce like apricots, plums, and some varieties of peaches.
How to Syrup Pack:
- Prepare Syrup: Prepare a cold syrup by dissolving sugar in water. Common ratios range from light (2 cups sugar to 4 cups water) to heavy (4 cups sugar to 4 cups water), depending on the sweetness of the fruit and your preference.
- Prepare Fruit: Wash, peel, pit, and slice fruit.
- Pack and Cover: Place the prepared fruit directly into freezer-safe containers. Pour the cold syrup over the fruit, ensuring it is completely submerged. Leave about 1/2 to 1 inch of headspace.
- Seal and Freeze: Seal the containers tightly, label, and freeze.
The syrup creates a protective barrier, preventing oxidation and freezer burn, which is particularly beneficial when freezing seasonal produce that is sensitive to air exposure.
Technique 5: Purée or Juice Freezing (Versatile for Many Fruits and Vegetables)
For fruits and vegetables that you plan to use in smoothies, sauces, soups, or baby food, puréeing or juicing before freezing is an incredibly efficient method. This is a fantastic way of freezing seasonal produce that might be slightly overripe or isn’t cosmetically perfect for other methods.
How to Purée or Juice Freeze:
- Prepare Produce: Wash, peel, core, or chop fruits and vegetables as needed. For some vegetables (like pumpkin or sweet potatoes), you might want to cook and mash them first.
- Purée or Juice: Use a blender, food processor, or juicer to create a smooth purée or juice. For a smoother texture, you can strain out seeds or skins.
- Add Additives (Optional): For fruits, you might add a small amount of sugar or lemon juice to prevent browning and enhance flavor. For vegetables, a pinch of salt can be added.
- Portion and Freeze: Pour the purée or juice into ice cube trays, freezer-safe containers, or freezer bags. For ice cube trays, once frozen, pop out the cubes and transfer them to a larger freezer bag for long-term storage.
- Seal and Store: Label clearly with contents and date.
This method is ideal when freezing seasonal produce like berries, peaches, apples (for applesauce), tomatoes (for sauce), pumpkin, squash, and various greens for green smoothies.
Specific Produce Spotlight: Best Practices for Freezing Popular Items
While the general techniques apply, some produce items benefit from specific considerations when freezing seasonal produce.
Freezing Berries (Strawberries, Blueberries, Raspberries):
These are best frozen using the dry pack method. Wash gently, pat dry thoroughly, and flash freeze on a baking sheet before transferring to bags. This prevents them from sticking together, allowing you to grab just a handful as needed.
Freezing Peaches and Nectarines:
Peel, pit, and slice. You can use the dry pack (for firmer slices), sugar pack, or syrup pack methods. A quick dip in a lemon juice solution (1 tbsp lemon juice to 1 cup water) before freezing can help prevent browning if not using sugar or syrup.
Freezing Corn:
Corn on the cob: Blanch for 7-11 minutes (depending on cob size), then cool, drain, and freeze whole. Corn kernels: Blanch the cob for 4 minutes, cool, then cut off the kernels and dry pack freeze.
Freezing Green Beans:
Wash, trim ends, and cut into desired lengths. Blanch for 3 minutes, cool rapidly in ice water, drain well, and then dry pack freeze.
Freezing Tomatoes:
Tomatoes can be frozen whole, peeled or unpeeled. For whole, simply wash and place in freezer bags. For sauces, you can blanch, peel, chop, and then freeze in purée form or chunks. Roasting them first adds depth of flavor before freezing for sauces.
Freezing Herbs:
Chop fresh herbs finely and mix with a little olive oil or water. Freeze in ice cube trays. Once frozen, transfer cubes to a freezer bag. This is excellent for basil, parsley, cilantro, and chives.
Freezing Leafy Greens (Spinach, Kale, Swiss Chard):
These are best blanched briefly (1-2 minutes), squeezed dry to remove excess water, then chopped and frozen in small portions, perhaps even pressed into ice cube trays for easy addition to smoothies or soups. Raw freezing often results in a very mushy texture.
Thawing and Using Your Frozen Seasonal Produce
Proper thawing is just as important as proper freezing to maintain quality when using your freezing seasonal produce.
- Fruits for Smoothies/Baking: Often, fruits can be used directly from the freezer without thawing, especially for smoothies, pies, or crumbles.
- Vegetables for Cooking: Most frozen vegetables can be added directly to stir-fries, soups, stews, or casseroles. If boiling or steaming, they often require less cooking time than fresh.
- Fruits for Eating Raw: For fruits intended for fresh eating (like on yogurt or cereal), thaw slowly in the refrigerator. Note that texture may be softer than fresh.
- Purées/Juices: Thaw in the refrigerator or use directly from frozen if adding to a hot dish.
Avoid refreezing thawed produce, as this can severely compromise texture and safety.
Common Mistakes to Avoid When Freezing Seasonal Produce
Even with the best intentions, mistakes can happen. Be aware of these pitfalls to ensure your efforts in freezing seasonal produce are successful:
- Not Blanching Vegetables: Skipping this step for most vegetables leads to poor color, flavor, and texture.
- Not Drying Produce Thoroughly: Excess moisture leads to ice crystals and freezer burn.
- Overpacking Containers: Leaving no headspace for liquids to expand can cause containers to burst.
- Not Removing Air from Packaging: Air is the enemy of frozen food, leading to freezer burn.
- Using Non-Freezer-Safe Packaging: Regular plastic bags or thin containers don’t provide adequate protection against freezer burn.
- Forgetting to Label: It’s easy to forget what’s what in a packed freezer. Labeling is crucial for organization and knowing when to use items.
- Freezing Overripe or Damaged Produce: Freezing preserves the current state; it doesn’t improve quality.
By avoiding these common errors, you’ll significantly improve the quality and enjoyment of your freezing seasonal produce.
The Future of Your Kitchen: A Year-Round Harvest
Embracing the techniques for freezing seasonal produce is more than just a kitchen chore; it’s a lifestyle choice. It’s about maximizing your resources, enjoying the freshest flavors, and ensuring a healthy, varied diet throughout the year. With a little planning and effort during peak season, you can fill your freezer with a vibrant array of fruits and vegetables, ready to be transformed into delicious meals at a moment’s notice.
As we move into 2026 and beyond, the emphasis on sustainable living and mindful consumption continues to grow. Freezing seasonal produce aligns perfectly with these values, empowering you to reduce waste, save money, and enjoy the bounty of each season, no matter the time of year. So, grab your harvest, get your freezer bags ready, and start preserving those precious flavors today!
Happy freezing!